Guide to Using MyEtherWallet
Keeping your Coins in an exchange can present a real risk of you losing them all because you do not technically “own” the coins you store in an exchange. Exchanges work like a bank; it is a third-party service provider that you trust to keep your coins safe. Having true ownership of your Coins means that you control your own private keys. And the only way you can control and manage your private keys is through owning your own wallet. The most common Ethereum wallet is MyEtherWallet. It is easy to set up and provides all the benefits of coin ownership. This simple guide will explain the steps needed for you to open your own MEW wallet.

Step 1: Go to MyEtherWallet Official Website
Make sure you Bookmark the page, as there have been many cases of phishing sites that mirror MEW’s site. As a precaution, you should also examine the URL and look for MYETHERWALLET LLC [US] Certificate to authenticate that this is the original MEW site.

Step 2: Create a Wallet
Create a new wallet by entering a secure password at the default front page. It’s good to have a long and arbitrary password to better secure your wallet. If you have a tendency to lose it, make sure you note it down and store it somewhere safe. Click on “Create New Wallet” to proceed”.

Step 3: Save Your Key File
Download the Keystore file (which is in UTC/JSON format) and make sure you do not lose it. Make a backup to be safe. A Keystore file is needed to recover or restoring your wallet. You can also use it to access your MEW wallet together with your password. After backing up your Keystore file, click on “I Understand. Continue”.

Step 4: Save Your Private Key
Private keys are like your PIN number to access your bank account, and it is important to ensure that ONLY YOU have access to your private keys. Keep it in a folder together with your Keystore File and encrypt it for enhanced security. Bear in mind that the Private keys are bare and not encrypted/password-protected.

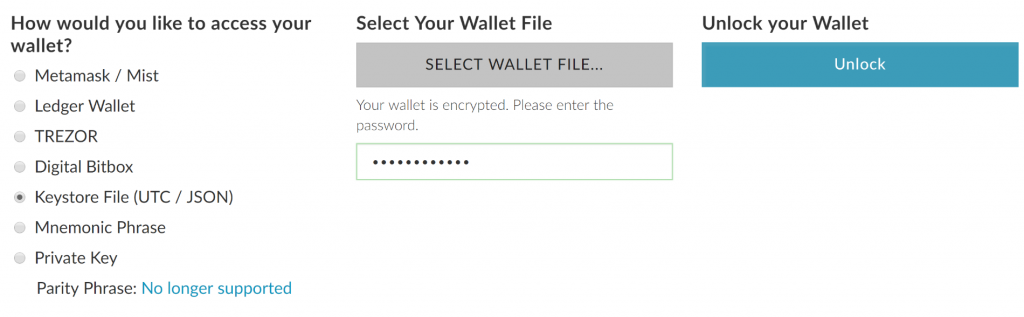
Step 5: Unlock Your Wallet
Your public keys are similar to your bank account number and represent the address that you share with others to receive ETH or ERC-20 coins. You can choose from a list of options on how to access your wallet. If you’re a beginner or one that does not have a hardware wallet, it is strongly recommended to pick the “Keystore File (UTC/JSON)” option. This means that every time you want to access your wallet, you should input your Keystore file and your password. A Keystore file is an encrypted version of your private key and is thus more secure.
Select the Keystore file (UTC) that you earlier downloaded and key in the password.
Step 6: Back-up Everything
Ensure that you’ve backed-up your Keystore File, your private keys and your public keys. You should store them in a secure location. Once you’ve unlocked your wallet, then congratulations! You’ve successfully created your very own wallet that supports ETH and *ERC-20 coins. You can send and receive Coins, participate in ICOs and check your balances. You can also save your public key (address) and private keys in the form of QR codes as can be seen below.
